This article describes how you could create a Mulesoft flow to create a Service Request in Service-Now.
First of all, you will need to have access to a Service-Now Development instance, for example:
* Replace with your company's development instance, if needed.
You will need a username and password to connect to this instance.
Go to https://developer.servicenow.com/ and register for a new account for testing purposes.
Once logged in, go to the MANAGE tab, and select Instance.
Create a new instance, and take note of the URL, admin username and password.
* The instance will be removed if there's no activity in 10 days.

For OOTB requests, there is typically one or more catalog items attached to a request.
Login to your service-now instance, in my case it's https://dev52286.service-now.com
Browse your service catalog and determine what kind of request you would like to make.
Navigate to Service Catalogs on the left navigation panel, then expand Catalog Definitions. You will see the Maintain Items link. Click on that and a list of items should appear.


Right click on any item and copy the sys_id. You will be needing this for later.

The ServiceNow connector allows you to perform CRUD operations on tables. As such, you will need to have some knowledge of the table structure in ServiceNow in order to proceed.
The tables associated with request and request items are as below:
Request [sc_request]
Requested Item [sc_req_item]
For creating Requests, at a very high level this is what you will be needing:
1. The sys_id of the service catalog item (as mentioned earlier)
2. Creation or association of the workflow to this catalog item. I used OOTB catalog item so I won't be going into details on this section.
3. Insert a new Request. Note the sys_id returned.
4. Insert a new Requested Item, passing the sys_id of the Request you created in step 3 into the "request" field on this new record
5. Update the Requested item record from Step 4 by passing the sys_id for the catalog item from Step 1 into the Requested item's "cat_item" field.
Leave the cat_item field blank when you insert a Request Item, then update that record by specifying a catalog item. Otherwise, the workflow associate to the catalog item cannot start.
Reference:
Now it's time to start developing your Mule flow.
 Launch Anypoint Studio and make sure you have the ServiceNow connector. If you don't, click on the Exchange button and search for ServiceNow connector. Install and restart Anypoint Studio.
You may read more about the connector here:
For simplicity's sake I split the request and update flows into subflows.
Let's start with the Create Request subflow.
Drag Sub Flow from the design palette to your mule configuration file.
Then, drag the ServiceNow connector inside the Sub Flow. I'm going to name this "Create Request".

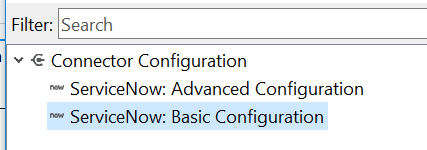
Add a new Basic connector configuration.
Fill in the details of your ServiceNow instance similar to below.

You can click on Validate Config to make sure the connection works.
After that, click on the refresh icon to the right of table field to load the schema.
Type Request for Table name. If you wait for a while, the autocomplete matches will appear.
Type insert for Operation.

You should now be able to see the config created in the Configuration XML. It should look similar to this:
<servicenow:config name="ServiceNow__Basic_Configuration" username="admin" password="*******" serviceAddress="https://dev52286.service-now.com/" doc:name="ServiceNow: Basic Configuration"/>
Drag Transform Message component to the left of the ServiceNow "Create Request" connector. You should see that the values are populated automatically in the Output mapping.

To create a simple request, I just filled in the description field. You may want to add other fields. My payload now looks like this.

Next, drag the Variable component to the right of the ServiceNow connector. I will be setting a variable called reqSysId. I'm going to extract this from the payload returned from the ServiceNow "Create Request" connector.
If successful, the connector will return an XML response with the sys_id. I want to capture this value and assign it as a string to the flow variable.
Insert an xpath expression to assign the value as below:
#[xpath3('/insertResponse/sys_id',payload,'STRING')]

Now that I'm done with Create Request, I'm going to create another Sub Flow to create the Requested Item.

The steps are pretty similar to the first Sub Flow, but instead of the Request table, I'm now going to insert a new record in the Requested Item table.

In the Transform Message component, make sure to assign the flowVars.sysItemId captured from inserting the Request earlier.
This will go into the request field.

Similar to the Request, a sys_id will be returned if Requested Item is created successfully. Assign this to a flow variable called catSysId. I'm going to use the same xpath expression from before.

Now it's time to update the Requested Item with the Catalog Item sys_id. Remember the sys_id that you copied from your service-now instance in the Catalog Item listing?
I'm going to create yet another Sub Flow to update the Requested Item.

Drag the ServiceNow connector to the mule config file.
Set the Table name as Requested Item, and the Operation as update.

This time I'm going to assign the category item sys_id to the newly created Requested Item. Drag the Transform Message flow to the left side of "Update Requested Item" and assign the flow variables:

By now, you might be wondering where did flowVars.catItemId come from. I'll get to that portion shortly.
So now we have all our Sub Flows ready, it's time to construct the main flow.
I'll expose this service via HTTP GET and POST.
Drag a HTTP Listener to the design palette. I won't go into details on the configuration as I assume you will have some familiarity with this.
Next, assign global variables. This is very important to declare them in the main flow so that it will be exposed to all child flows.
Being lazy, I'm going to use an expression component to assign all flow variables. I will hard code the Catalog Item sys_id here. You could even pass it dynamically via post or get parameters to make different types of requests.

Next, I'm adding flow references to create Request, create Requested Item and update Requested Item.
Finally, I will convert the payload (using Transform Message) from update Requested Item to JSON, for easier reading and send it back as the HTTP response.

Test using POSTMAN and you should be able to get a JSON response with the sys_id if the request was successful.

The flow snippets look like this:
Main Flow - Create Service Request
   <flow name="createServiceRequest">
     <http:listener config-ref="HTTP_Listener_Configuration" path="/sn/create-request" allowedMethods="GET,POST" doc:name="HTTP"/>
     <expression-component doc:name="Set global flowVars"><![CDATA[flowVars.reqSysId = '';
 flowVars.catSysId = '';
 flowVars.catItemId = 'f5d8d3f6e8b721004ece55c82c089cc6';]]></expression-component>
     <flow-ref name="serviceNowCreateRequest" doc:name="serviceNowCreateRequest"/>
     <flow-ref name="serviceNowCreateRequestedItem" doc:name="serviceNowCreateRequestedItem"/>
     <flow-ref name="serviceNowUpdateRequestedItem" doc:name="serviceNowUpdateRequestedItem"/>
     <dw:transform-message doc:name="Transform Message">
       <dw:set-payload><![CDATA[%dw 1.0
 %output application/json
 ---
 payload]]></dw:set-payload>
     </dw:transform-message>
   </flow>
Sub Flow - Create Requested Item
   <sub-flow name="serviceNowCreateRequestedItem">
     <dw:transform-message doc:name="Transform Message">
       <dw:set-payload><![CDATA[%dw 1.0
 %output application/xml
 %namespace ns0 http://www.service-now.com/sc_req_item
 %namespace ns01 http://www.service-now.com/sc_request
 ---
 {
      ns0#insert: {
           request: flowVars.reqSysId
      }
 }]]></dw:set-payload>
     </dw:transform-message>
     <servicenow:invoke config-ref="ServiceNow__Basic_Configuration" type="sc_req_item||insert" doc:name="Create Requested Item"/>
     <set-variable variableName="catSysId" value="#[xpath3('/insertResponse/sys_id',payload,'STRING')]" doc:name="Variable"/>
     <logger message="#[flowVars.catSysId]" level="INFO" doc:name="Logger"/>
   </sub-flow>
Sub Flow - Create Request
   <sub-flow name="serviceNowCreateRequest">
     <dw:transform-message doc:name="Transform Message">
       <dw:set-payload><![CDATA[%dw 1.0
 %output application/xml
 %namespace ns0 http://www.service-now.com/sc_request
 ---
 {
      ns0#insert: {
           description: "this is a test"
      }
 }]]></dw:set-payload>
     </dw:transform-message>
     <servicenow:invoke config-ref="ServiceNow__Basic_Configuration" type="sc_request||insert" doc:name="Create Request"/>
     <set-variable variableName="reqSysId" value="#[xpath3('/insertResponse/sys_id',payload,'STRING')]" doc:name="Variable"/>
     <logger message="#[flowVars.reqSysId]" level="INFO" doc:name="Logger"/>
   </sub-flow>
Sub Flow - Update Requested Item
   <sub-flow name="serviceNowUpdateRequestedItem">
     <dw:transform-message doc:name="Transform Message">
       <dw:set-payload><![CDATA[%dw 1.0
 %output application/xml
 %namespace ns0 http://www.service-now.com/sc_req_item
 ---
 {
      ns0#update: {
           cat_item: flowVars.catItemId,
           sys_id: flowVars.catSysId
      }
 }]]></dw:set-payload>
     </dw:transform-message>
     <servicenow:invoke config-ref="ServiceNow__Basic_Configuration" type="sc_req_item||update" doc:name="Update Requested Item"/>
   </sub-flow>

13 comments:
This is really great informative blog. Keep sharing. ServiceNow Training in Hyderabad
It was so interesting to read, you really provide good information. Very awesome blog that you created Thank you very much for sharing this great article with us.
Mulesoft Online Training
Mulesoft Training in Hyderabad
Thanks for Sharing This Article.It is very so much valuable content. I hope these Commenting lists will help to my website
top servicenow online training
Thanks for delivering good stuff, Explanation is good, Nice Article.
Mulesoft Training in Hyderabad
Mulesoft Online Training
Thanks for your valuable information. Very good article.
servicenow training
servicenow certification
This is a nice article you shared great information I have read it thanks for giving such a wonderful Blog for the reader!
Mulesoft online training in Hyderabad!
Too good article,keep sharing more posts with us.
thank you....
Servicenow online training
Servicenow course online
Servicenow certification
Servicenow admin online training
servicenow online training india
servicenow online training hyderabad
servicenow course
This is an amazing blog, thank you so much for sharing such valuable information with us.
Mule 4 Online Training
Learn Mulesoft
Thank you for sharing wonderful information with us to get some idea about that content.
Mulesoft Training
Mulesoft Self Learning
MuleSoft training
MuleSoft online training
Excellent blog I visit this blog it's really awesome. The important thing is that in this blog content written clearly and understandable. The content of information is very informative. We are also providing the best services click on below links to visit our website.
Oracle Fusion HCM Training
Workday Training
Okta Training
Palo Alto Training
Adobe Analytics Training
Grab the astounding Azure Training in Chennai along with the best DevOps Training and Java training from Infycle Technologies, the best software training institute in Chennai. Call 7504633633 to get the best placement guidance along with the software training for having a lucrative career in the software industry.
Thank you for sharing wonderful informationSnowflake Training In Hyderabad
Post a Comment